Thursday, February 28, 2013

DIY ~ Funny Flower

One of the kidlets needed a flower for a prop in her dance!
I figured I could probably make that!!!
 
 
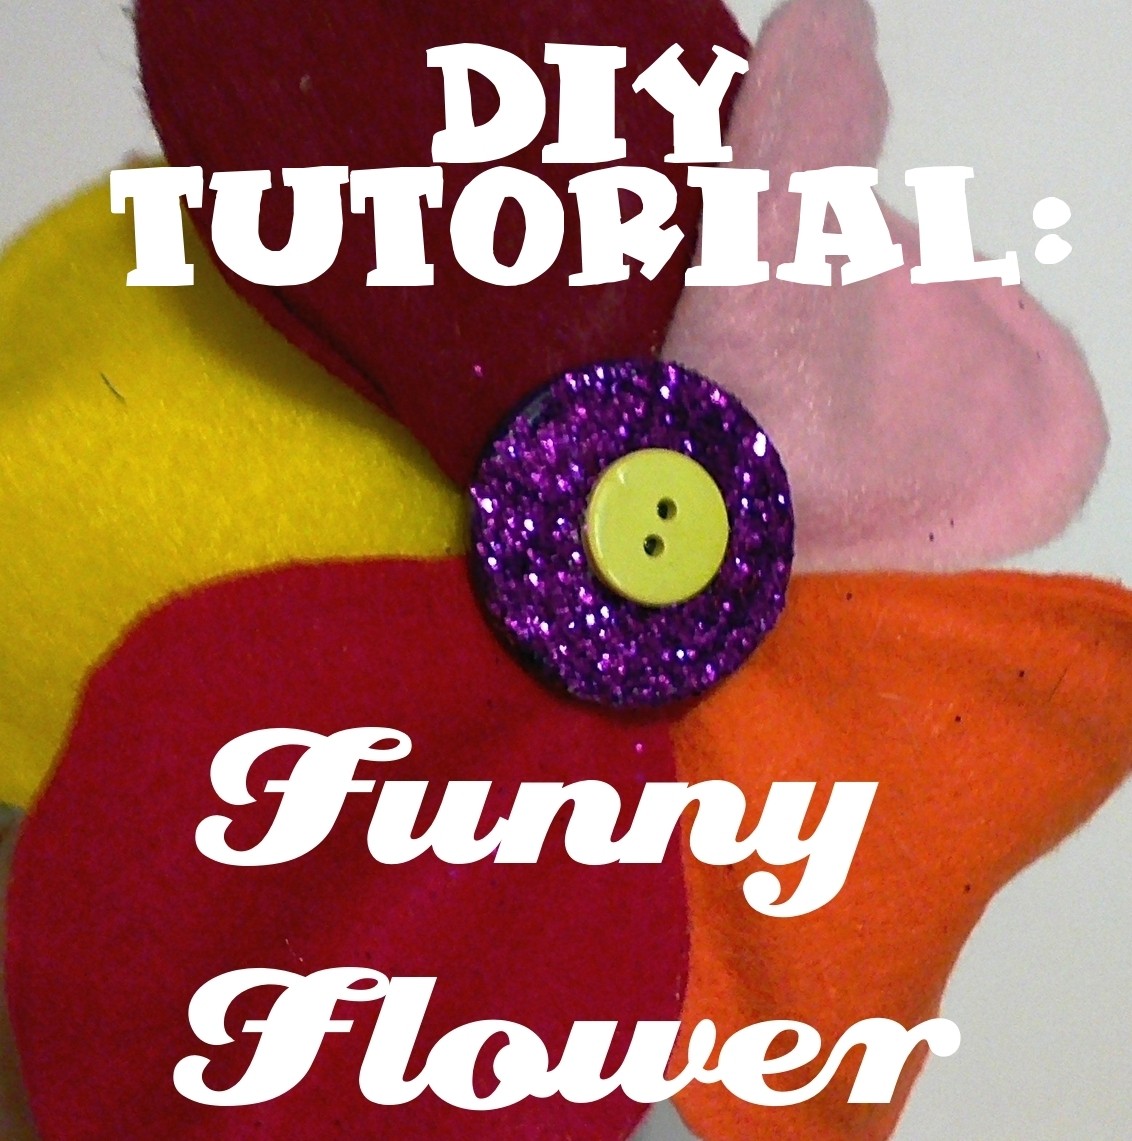
Here's what I came up with...
 
 
First twist 5 green pipe cleaners.
 
 
Cut out 2 green  leaf shapes from felt.
 
 
Cut 10 "tear" shaped felt pedals.
Two of each color.
Bend half of a pipe cleaner (in a color that matches your petal) and glue to one side of your petal.
Now glue your other matching petal on top so the pipe cleaner is inside.
 
 
Repeat with all five of your petals.
At the top of your pipe cleaner "stem", fan the pipes out and glue a petal to each one.
 
 
For the center glue 2 buttons on top of each other and attach right in the middle.
I then used Mod Podge and some glitter to add a lil' sparkle!
 
 
Bend your leaves and pedals however you want!
 

Funky eh?
 
Cheers,
Messy


Tuesday, February 26, 2013

DIY ~ Pillowcase Sash Skirt

This is one of the last fun pillowcases I had so I wanted to do something special with it.
 
 
I used some left over fabric from my bedskirt I'm half way through making.


First take your pillowcase and cut off the unopened end across from the open end.
 
On each end and side (where the seams are) measure in an inch.
 
Sew down the sides.
Iron seams flat.
Iron your hem 1/4 inch then a half inch on both top and bottom.
To make your sash, fold a 40 inch long by ten inch piece in half and iron rights sides together.
 
 
Sew down one side, leaving ends open.
Reverse and iron flat.
 
 
Find the center of your sash and sew it to the waist of your skirt.
 
 
This skirt is on sale now in my shop :)
Cheers,
Messy


Monday, February 25, 2013

New Lot at the Shop!!!

My shop is busting at the seams with new clothes!
Come on over and check it out!
 
 
Everything is one of a kind!
 
Cheers,
Messy


Sunday, February 24, 2013

DIY ~ Emma's Head Piece

My dear friend Emma is doing her very first solo this year at dance competition!!
We went the other day to find her a cute top to wear and we found a super sparkly tunic that did just the trick.
Now she just needed a matching hair piece to finish off the look!
Here's how I made it!
 
Take four or five bobby pins and glue the end of a 3 inch piece of ribbon to the top.
Wrap it around the top prongs of the bobbypins.


Secure the loose end with your glue gun.

 
Embellish however you want.
I used feathers, a fabric polkadot flower, some fake lei flowers and glue gun!!!
 

I also added some sparkly pipecleaners that I swisted around my finger!


It turned out super cute!
Cheers,
Messy


Saturday, February 23, 2013

My Faves ~ The Goad Abode

Have you ever stumbled onto the blog The Goad Abode.
She is soooo adorbs.
 
the goad abode
 
This baby mama, wifey, DIYer and crafty lady has the most awesome stuff on her site!!!
She's about ready to have a baby, but is still poppin' out tonnes of lovely DIY's!
I've gotten some great ideas!
 
Pop on over to her blog and say!
Tell her Messy sent ya!
 
Cheers,
Messy


Friday, February 22, 2013

DIY ~ Hair Bows

I love to wear fancy hair accessories in my bun for dance!
A plain ol' bun gets so boring!!! Heehee!
 
Here's how I made a whole bunch so I have lots to choose from!
One to match every pair of crazy leggings! LOL
 
 
First take some felt and cut a strip about an inch to an inch and a half wide and about 7 inches long.
 
 
Using a glue gun, make a stripe of glue down the center and fold each end into it.
 

Now cut a small strip of felt about a 1/4 of an inch wide and 2 inches long.
Pinch your felt in the middle.


Glue one end of your small bit to the back of your "bow".
Glue a bobby pin just at the fold part onto the back as well.
Wrap your middle small piece around the front and back around to the back.
Pull it through the bobby pin so it covers the edge where you glues it on.
Glue to secure the end of the middle piece of felt and clip end if too long.


Aren't they cute?!?
I've been wearing them lots!
 
Cheers,
Messy

Thursday, February 21, 2013

Etsy Love ~ Bowls

Malachite Green Lotus Ring Holder Bowl Ring Dish
Red vintage enamel bowl, white hearts decoration
3 nesting ceramic heart bowls -  4 inches handmade - wheel thrown - ready to ship
Personalized Yarn Bowl - Handmade to Order
Papier mache bowl with gold leaf
 
I love bowls.
I could own copious amounts of bowls.
*sigh*
 
Cheers,
Messy


Wednesday, February 20, 2013

DIY ~ Cherry Wristlet!

I love cherry fabric!
It's so perfectly retro!
 
I only had a small scrap left, so I made this super cute clutch/wristlet!
 
 First fold a rectangle of fabric in half right sides facing eachother.
Sew all around leaving a hole in the top corner about 2 inches down so you can reverse it.
Reverse and iron flat.

Fold your piece into three sections using your iron to press it firm.
Tow even parts and one small lip/hangover as the top.
 

Cut a long thin strip of material approximately 4 inches wide..
Fold rights sides facing eachother and sew down the long side.
Leave ends open so you can reverse it right side in.
 
Press flat to make your wrist holder.
Fold that strip in half and tuck the raw edges into the hole on the side of your main part.
Pin to hold it there.


Sew your sides making sure not to sew your lip down.
Make sure to sew your wrist loop into this seam as well!


Embellish however youwould like!
I added a vintage wood button with some twine and my clasp! :)


For sale in my store now!!!
 
Cheers,
Messy


Tuesday, February 19, 2013

This Is How I Cook ~ Mars Bar Squares

MMMMMMMMMMM......
Mars Bar Squares......
mmmmmmmmmmmmmmmmmmmmmm.....
 
This is my favorite treat EVER.
My mom always made these at Christmas time and I would stuff my face.
 
You Need:
4 Mars Bars
1/2 cup butter or margarine
3 cups Rice Krispies
Topping:
1 cup chocolate chips
1/4 cup butter or margarine
 

First cut up your four mars bars.


Melt them in a large pot on medium with your first amount of butter.
Once completely melted and mixed together, remove from heat and stir in your Rice Krispies.


Mix well.
Press the mixture into a 9 inch glass dish.
 
Now make your topping.
Melt your chocolate chips and second amount of butter together.


Spread it over your mars bar rice krispies.
Put int he fridge to set for an hour.
 
Cut into small squares and serve!
Yummy!


This is my friend Deb who helped me make them :)
Great time!!!
 
Cheers,
Messy


Monday, February 18, 2013

DIY ~ Shiney Silver Pencil Skirt

I absolutely love how this turned out!
Pencil skirts are so flattering, plus with the shiney fabric you can either dress it up, or dress it down!
 
Start by measuring your waist and hips.
Whichever is larger, you want to measure your fabric and add 2.5 inches to each side.
So, my hips are 32 inches...so I am added 2.5 to each side so my width is 37 inches.
Now measure from your waist to the top of you knee.
Add 2.5 inches to both ends of that length as well.
Once measured lay your fabric pieces out and measure 1inch on each side in, just at the bottom.
Where your hips will end in the skirt (approx 10 inches down from waist) is where you want to start your tapering.
Finish each side at the 1 inch in mark along your bottom edge.
Sew fabric pieces right sides in down both sides.
 

Fold and iron your hems.
Bottom I did a small 1/2 inch hem folding the raw edge up a 1/2 inch and ironing, then folding over again (so raw edge is hidden).
On the top waist area, fold over a half inch and iron, then fold over 1.5 inch and iron.
This makes a long tube around the waist for your elastic.
When sewing waistband, make sure to leave hole about 1.5 inches open so you can put the elastic through.

Insert your elastic using a safety pin to guide it through.

I love the color, shape, texture - EVERYTHING!
This beauty is for sale in my shop here NOW!

Cheers,
Messy