Sunday, June 30, 2013

DIY ~ Dandelion Puff Painted Mirrors

I have had these mirrors forever and didn't think I could do much with them since I only had two.
Then I realized I shouldn't be so structured...I could do a set of something instead of a trio.
LOL LOL


Sticking to my usual artistry...


WHAT YOU NEED:
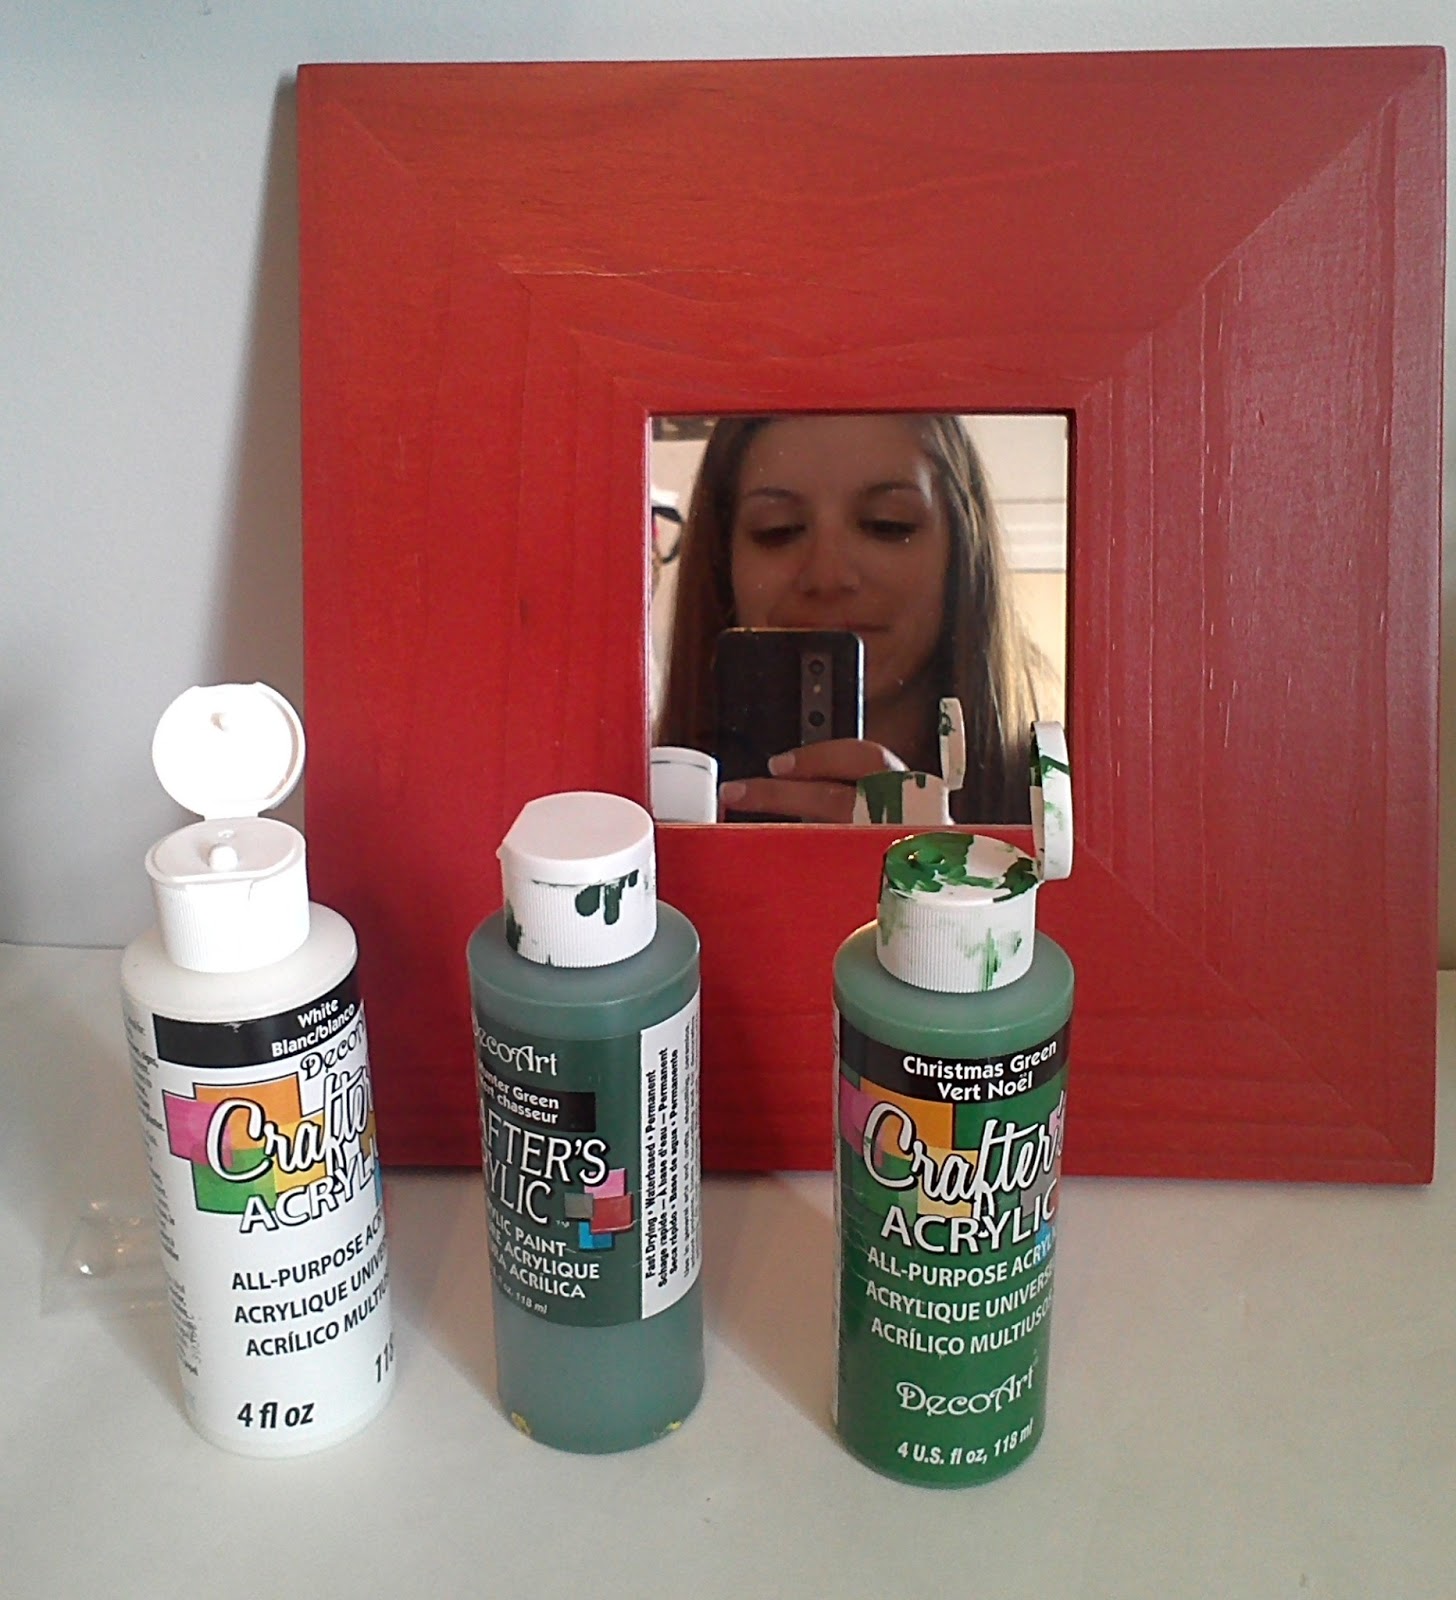
two square Ikea mirrors
light green, dark green, white and brown acrylic paint
mini paintbrush
dry flat and fat paint brush

Unwrap your mirrors and place them side by side in front of you.
Make sure they are perfectly lined up so your artwork works at the end.


Paint two slightly rounded lines from the bottom left corner using light green.
These are the stems.
Let dry a minute.
Using dark green do a line on one side of the stem.
Using white make a line down the center of the stem.


Using your small paint brush start fanning out small strokes in a circle to create your puff at the top of each stem. 
Use the dry bigger brush at the edges to make them more transparent and fluffy looking.
Add more white to the center area if needed.
Also add a small amount of brown for the center.
Work it into the white.


Paint white lines, some a big curved in all directions. 
All different sizes, lengths and widths.


Hang side by side :)


Cheers, 
Messy

Saturday, June 29, 2013

PL Peek ~ Lemon Lane Point

There's this lil' place you can go and drink milkshakes called Lemon Lane.
It's pretty sweet.
I stopped in there the other day when I was down that way and took some photos :)


The beautiful St. Lawrence River :)

Cheers,
Messy

Friday, June 28, 2013

DIY ~ Nautical Button Bracelet


I adore these anchor buttons I have and I really wanted a cool bracelet to go with my new full arm bracelet sleeve thing I'm doing. LOL

WHAT YOU NEED:
Nautical Button with a back loop (not holes)
leather rope
safety pin
baking twine (optional)


First take 3 strands of your leather rope and 2 strands of backing twine. 
Knot at one end.
Attach it to your knee (of your pants) with your safety pin.
Braid together putting the bakers twine with one of the strands.
Half way down put your button on...then keep braiding to your desired length.


You can add a clasp if you want, but I just tied mine on with the rest :)


Cheers,
Messy


Thursday, June 27, 2013

Thrift Shop Finds ~ Summers Startin'

The other day I went to Kingston with my Bestest Neighbor Friend.
We went to Pizza Hut for lunch and popped into  our favorite store -Value Village!
Not only was it a fab day because we got to go...but it was also 50% off day!!!
YAY YAY YAY YAY YAY

Here's what I scored:
Fuchsia Tank Top with back ruffle $5.99  $3.00

 The Gap Khaki Shorts $9.99 $5.00

 Authentic Indian Sari $17.99 $9.00

 Vintage Maxi Dress with Pockets $7.99 $4.00

Striped Denim pants with side Button closure $8.99 $4.50
(I'm gonna make these shorts)

Good finds eh?
What have you found recently?

Cheers,
Messy

Wednesday, June 26, 2013

DIY ~ Pocket T

I get bored of plain ol' blank T's all the time.
I saw this little idea and had to try it!


WHAT YOU NEED:
tshirt
piece of fun funky fabric
fabric glue
iron


First lay your tshirt flat on your ironing board with just the front of the tshirt on the top.
Decide how big you want you pocket and cut your square. 
Remember that you need enough to iron over each edge and still make your pocket.


Iron over each edge.
Iron the bottom corners in.


Using the fabric glue, place a small amount on the sides and bottom.
NOT THE TOP.


Press firmly in the place you want it on your tshirt.


Let set for 2 - 4 hours.
Now you have a funky pocket! :)


{Like my cray cray hair?!? That's humidity for ya!!!}


Cheers,
Messy

Tuesday, June 25, 2013

Product Review ~ Dial Body Wash

I was at the Rexall the other day looking for cheap body wash and I saw this gem.
I have never used Dial before, and I had no idea they were producing body washes now.

I opened the cap and the sweet aroma of tangerine and guava came pouring out!
So delicious!
It was on sale for $2 so I thought I would give it a shot!


Everything about this product is amazeballs.
The consistency is not to chunky and not to watery, the smell is to die for and it lingers after your dry off and it lathers up a storm!!!
Yay bubbles! :)


I give it a full 10 out of 10 and am definitely buying it again!

Cheers,
Messy

Monday, June 24, 2013

New Lot at the Shop!

There are tonnes of new shoes in the shop right now...
it's cray cray.


I've also put up some new art projects that turned out fab!


Head on over and check out all the new stuff!

Cheers,
Messy

Saturday, June 22, 2013

Outfit Post ~ Tube it.

Hey Peeps.
Here is an outfit for ya!
This is a day I was going to work at the Boarding School.
I made this "undershirt" tube here!


Please excuse my horrendously disorganized room. 
I was still just moving in...
and lets face it...
unpacking my bedroom was not as important as unpacking my craft room! LOL


Cheers,
Messy

Friday, June 21, 2013

DIY ~ Nautical Coasters

We are having a huge festival with a whole bunch of Tall Ships this weekend to celebrate the opening of our new waterfront in town.
The market is open all weekend, so I am trying to whip up some nautical stuff for the boaters out there :)
WHAT YOU NEED:
Thick rope
hot glue gun
black paint
mini paint brush
scissors

First take the end of your rope and start coiling it.
Use glue right on the tip so when you make your first fold in it sticks well right away.


Keep coiling and gluing the edge as you go...


Using black paint and a small paint brush, draw on your anchors.


I made sets of 4 and wrapped them up with twine to sell!
Now I want a pair!!!


Cheers,
Messy