Monday, July 22, 2013

DIY ~ Upcycled "Home" Decor


I had these cute letters that spelled the word "home".
I believe I got them at Dollarama.
I wanted to spruce them up a bit, so here is what I did.


WHAT YOU NEED:
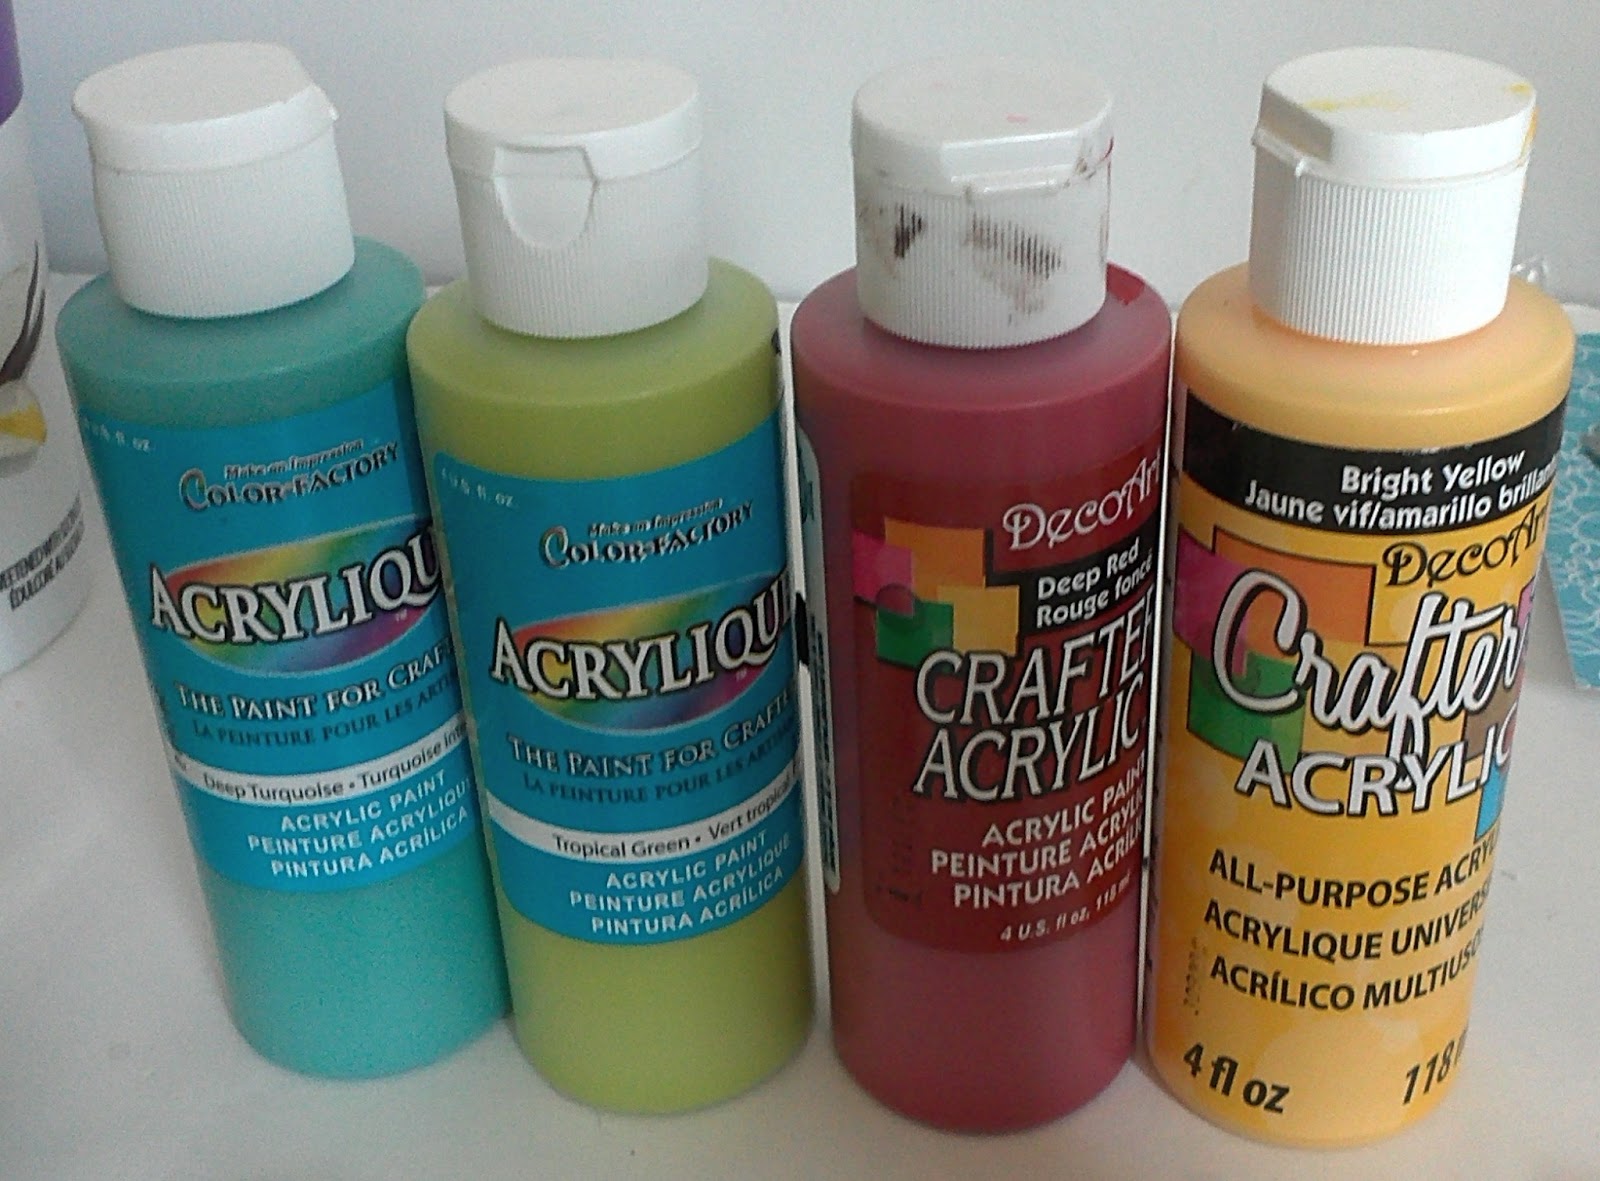
acrylic craft paint in 4 colors and black
mini paint brush
medium flat paint brush
mod podge
silver/clear sticky gems

First do a thin black line around the outside of each letter.


Once that is dry, pick a color and start painting swirls all throughout the middle part.


Once those are dry, add your gems wherever you have a space!


Lightly clear coat with a thin layer of mod podge.


Make sure you don't have too much excess mod podge around the gems or it wont dry clear!


Let dry and stand on a mantel, desk, book shelf, wherever!!!


Cheers,
Messy

Saturday, July 20, 2013

DIY ~ Beaded Knot Bracelet


Oh...this is so cute and easy!


WHAT YOU NEED:
rope twine
beads
hot glue gun
scissors


First take your rope twine and tie a loop knot at the end.
Add a bead and knot right under it.


Keep doing this as much as you would like or until your bracelet is the size you want.
I left some spaces without beads as well as used two different kinds.


When finished, tie a bead on to be your clasp through your hole.
Hot glue the end knots to make sure they don't come apart.


Works perfect.


So lovely!
Cheers,
Messy

Thursday, July 18, 2013

DIY ~ Pillowcase Tube Dress

Wow!
I was uber lucky to find these amazeballs pillowcases!


WHAT YOU NEED:
pillowcase
sewing machine
tape measure
pins
iron and board
elastic
flower (optional)
scissors

First take your pillowcase and iron it our flat.

Using scissors cut just a small amount of the sewn together end.


Now flip your pillowcase inside out.

Iron a quarter of an inch down from the top.
Then old and iron down another inch and a quarter.

Sew this pocket "tube" along the bottom of your folded part leaving a hole at the back to insert your elastic.


Measure the elastic for the top of your bust.
Feed it through the tube at the top and sew the ends together.

Hand sew on your flower detail if desires.


Tada!
New strapless dress.
It's just that easy!


Cheers,
Messy

Friday, July 12, 2013

DIY ~ Beyoutiful Painting


This turned out super cute!
Don'tcha think?
It's for sale now in my shop :)

WHAT YOU NEED:
white canvas
pencil
eraser
paint
small and medium paint brushes'
clear coat


First using your pencil lightly draw your "you" near the center.
Now add "be" at the top in script, as well as "tiful" at the bottom.


Using a small paintbrush trace out your "you" with black paint.
Inside the bubbly letters loosely draw some flowers and leaves around adding lots of color.
In between the flowers do gold dots to fill in the white space.
Kinda tedious...but great look!


Do your other letters in gold and fix any touch ups if needed.


Beautiful.
:)

Cheers,
Messy

Thursday, July 11, 2013

New Shoes!

Check out all my shoes at www.2messy.etsy.com
Or come see me at the Brockville Farmer's Market every Saturday from 7am - 1pm!


Wednesday, July 10, 2013

DIY ~ Cork Board Circles


Love these!

WHAT YOU NEED:
round cork rivets
fabric
scissors
hot glue gun
scrapbooking paper
pop can tab
push pin
felt pen


First pick your fabric.
Trace around your cork round with a pen leaving a good 1 - 2 inches to fold over.


 Cut your circle out.


Using your hot glue gun, fold the edges to the back and secure.


Cut out a piece of scrapbook paper the same size as your circle and glue it on the back to cover the raw edges.
I used a pop can tab and a push pin to make a hanger.


Hang them in three's and post you to do notes on them :)

I love mine!

Cheers,
Messy

Monday, July 8, 2013

DIY ~ Feather Boho Necklace


I love Native arts and Boho Chic things.
I had these awesome feathers so I decided to see what i could come up with...


YOU WILL NEED:
pliers
leather string
beads
bead crimpers
feathers
hot glue
scissors

First measure how long you want your leather string to be. 
Fold your piece in half and loop it around your neck.


Trim your leather into a peak at the end so it is easier to get your beads on.
Start adding as many beads to each end as you would like.
Tie a knot at the tip to get them all to stay.


Add your feather by putting a dot of glue on your end knot and attaching the stem of the feather.
Pull your bead down over top.


Tie it back around your neck :)

Pretty eh?
Yet so simple...

Cheers,
Messy