Saturday, January 7, 2012

Grrrrrrr!!!!!!

My frusteration level is at it's MAX!!!! I keep writing a big long post and I can't get my photos to upload.

I give up...for today!!! :(

Wednesday, January 4, 2012

Letters


Dear Home:
You are way better then I remember :)

Dear Chuck Norris:
Not only did you gain weight at the puppy sitters but you also became super cuddly. Like, all the time.

Dear Winter Roads:
Please please please be ok tomorrow so I can drive to the ski hill and ski for the first time in 11 years. 

Dear Skiing:
Please don't let me die.

Dear Muscles: 
Please don't ruin my life by being soooooo sore on Friday from skiing tomorrow.

Dear Underneath My Rib Pain:
Please be an Ulcer and not Cancer.  Actually...please be imaginary and nothing at all. {sigh}


Cheers,
Messy

Tuesday, January 3, 2012

This is How I Cook: Cake Pops!

Oh lordy lordy lordy! This was an experience. I'm not gonna lie....I got very frustrated. LOL But this is all due to cooking/baking experience and knowledge...not the recipe, I don't think.

I followed this easy version on pinterest but I kinda bought the wrong chocolate and the dipping didn't work so well...

WHAT YOU'LL NEED:

- cake mix
- 1 can of icing
- sticks
- mini bags
- melting chocolate


Make your cake according to the instructions on the box. ( I used Spice cake and Buttercream icing). 


Once finished and fully cooled, crumble it into a bowl and mix in your can of icing (I used about 3/4th and it was perfect).


Roll your balls and place on a cookie sheet in the fridge over night.


Once balls are cold, melt your chocolate. Dip your stick in the chocolate and insert half way through your balls on the flat side.


You should use thin chocolate that you can dip your pop in, but I screwed up and thought chocolate chips would work. Not the case. I had to drip my chocolate on to coat and placed them on a sheet to harden. I also sprinkled crushed candy canes on top to add some pizzaz.


 Then I put them in mini bags and tied with a little ribbon! :) So cute!

Cheers,
Messy

Monday, January 2, 2012

Etsy Love - New Years

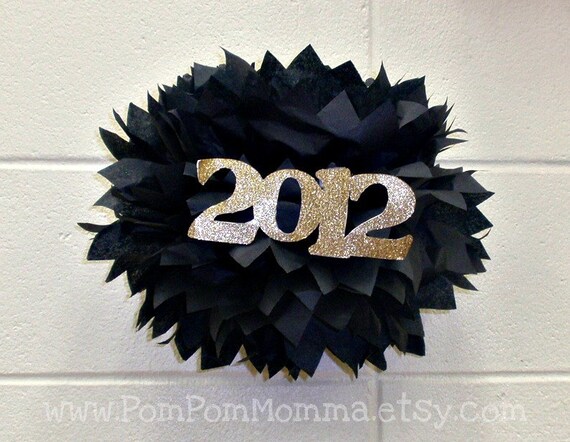
NEW YEARS sign, 2012 garland decoration wall hanging black and white FREE Shipping

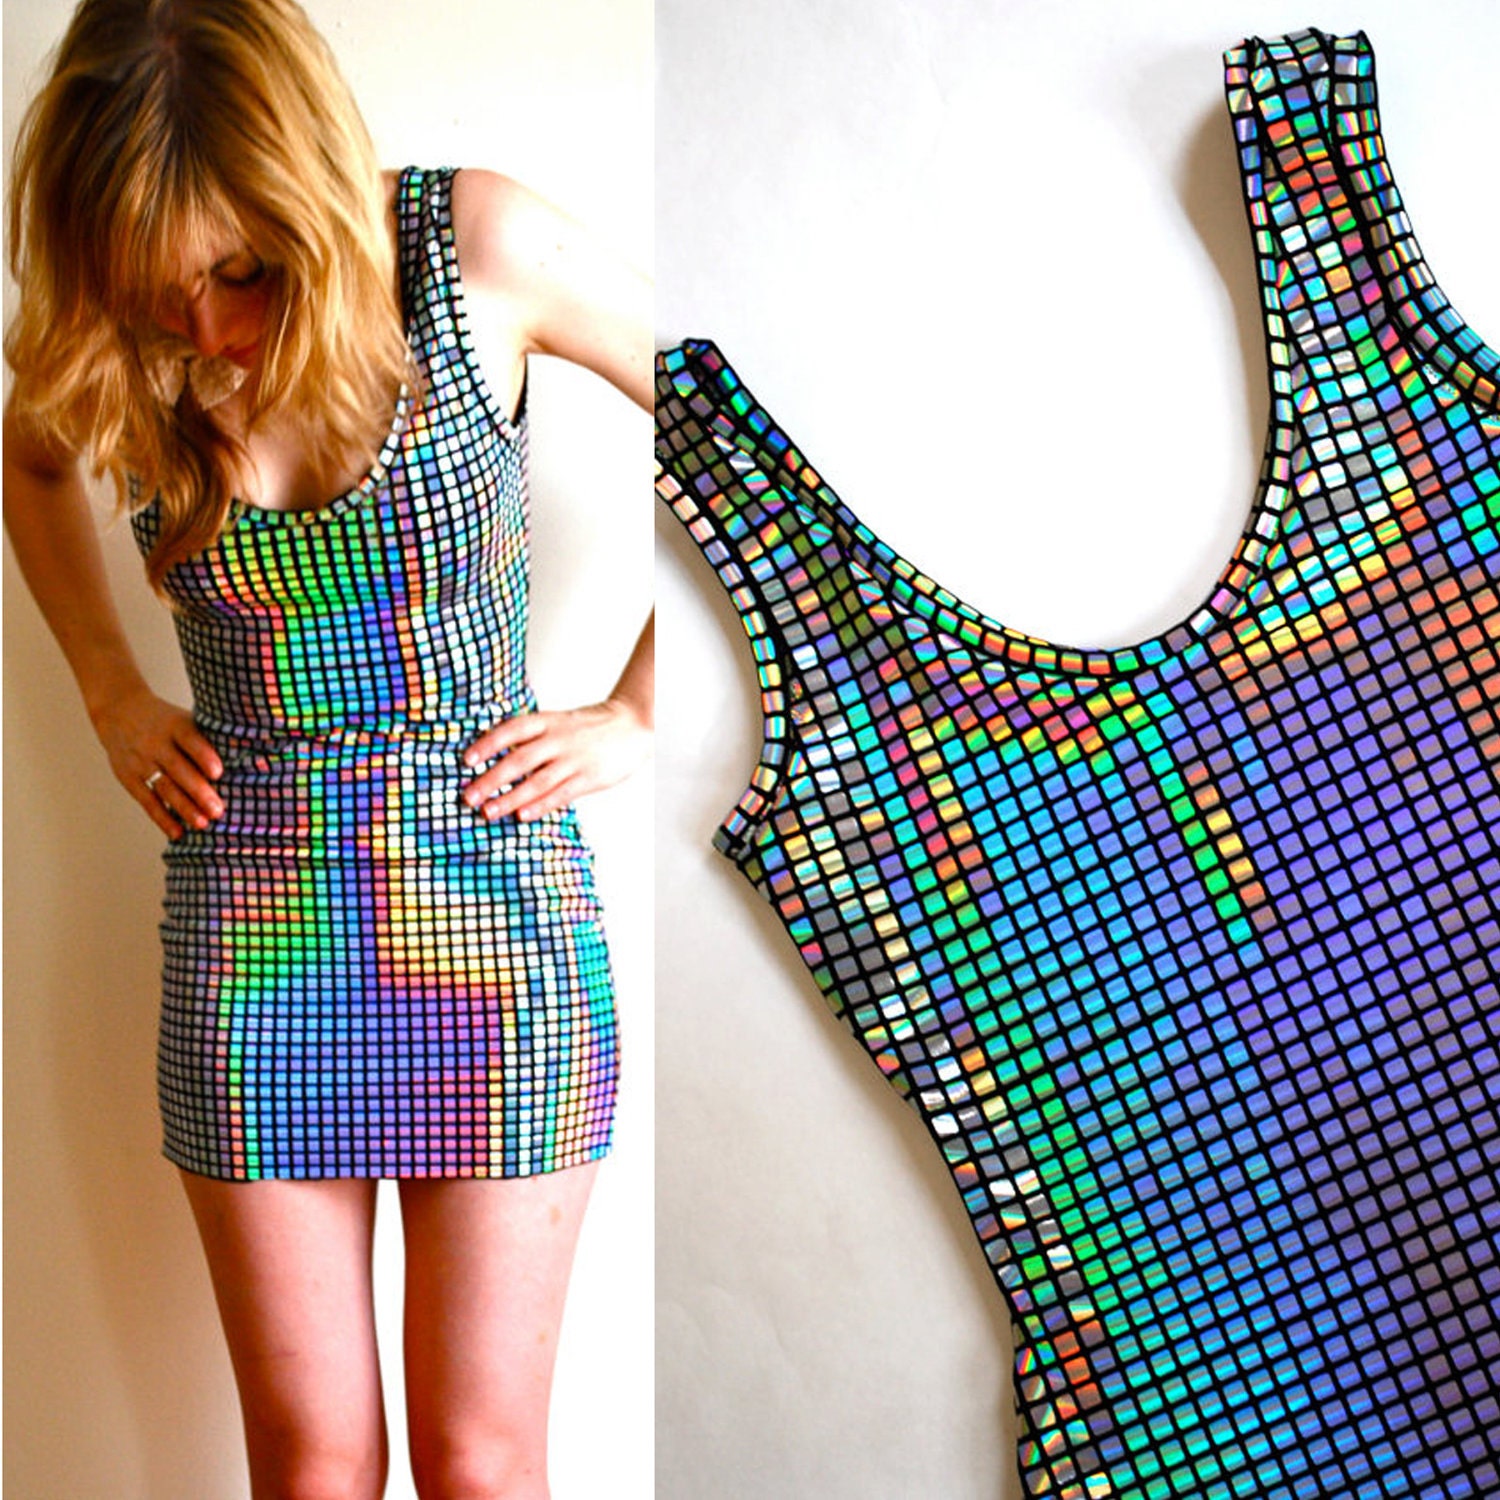
Disco Ball New Years Dress ALL SIZES

New Years Party Pom

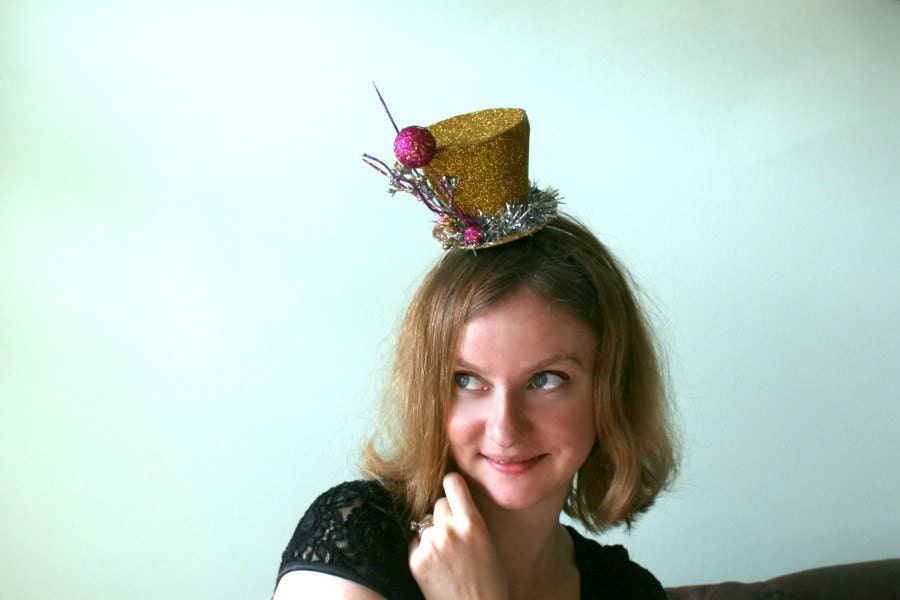
New Years Party Hat - Mini Top Hat in "Times Square" - Gold Base Silver Tinsel & Pink and Silver Accents - Headband Fascinator

We spent New Years in Calgary with all our old friends and it was really lovely!!! :) We had surf and turf, played some darts and celebrated in style!
Cheers,
Messy!

Wednesday, December 28, 2011

I Miss Chuck Norris!!! :(

My poor poor poor puppy has been at a puppy sitter over Christmas and I feel terrible!!! I have never left him for more than two nights and I'm worried he will think I don't love him :( I know that's not what he is thinking and he probably is a little happy to get a break from my smothering...LOL {sigh} I still miss him though.

Here is my favorite picture of my baby Chuck Norris!

Love You, Miss you Buddy! xoxoxoxox

Cheers,
Messy

Sunday, December 18, 2011

This Is How I Cook: Blackberry Mini Pies

Since we are away for so long over Christmas, I am trying to clean out our fridge and use up all our food. I was majorly craving dessert tonight and needed something sweet and fresh. I looked in the fridge and there wasn't many options...but I did have a pie crust left from doing my Christmas Cherry Tarts! Plus, My Paddy had bought some blackberries that were starting to wilt a little. I knew I didn't have enough berries for a whole pie and we didn't have any other fruit except for lemons. Hmmmm...so I decided to make mini pies. :) I also didn't have a recipe and have never made blackberry pie filling before...so this is what I did...


First preheat your oven to 350F. In a small bowl beat blackberries, jam (I used strawberry),  half a lemons juice,1 tbsp. cornstarch, 1/2 cup white sugar and a little vanilla extract.


Using a circle cutter cut out largest circles and put in each tin. Place 2 or 3 spoonfuls of the filling into your cup and top it off with a little shape for prettiness! :)


Use cooking spray and spray muffin tins.


Bake for 25 minutes or until edges are golden brown. Let stand for 10 minutes before eating.

I whipped us up some Dream Whip as a cool side and it was delish - we each ate two! :) Yummers!

Cheers,
Messy

Ad Space!!!!!

Anyone wanna trade buttons and get free ad space on my blog for the month of January???


If you do, please email {2Messy@mail.com} a button size 185 x 100 pixels and the link you would like it to go to.

I will also be doing a sponsor post in January so please answer these 5 questions:

1) What is your favorite DIY you have ever done?
2) How many people in your family?
3) What is your New Years Resolution?
4) If you could travel to one place anywhere in the world, where would it be?
5) If you had to change your whole name today, what would you change it to?

**Don't forget to send any other links you would like added in the post, twitter, bloglovin, facebook, etc. :)

Cheers,
Messy

Friday, December 16, 2011

This Is How I cook: Pretzle Snacky Thingy's

Hello:

Today I am posting about these lovely little morsels of delishousness I made for my neighbor gifts. I found them on pinterest and couldn't resist trying them since they seem so easy peasy!
WHAT YOU NEED:

- pretzels
- Hersey Kisses
- M & M's in red & green
- cookie sheet

Preheat your oven to 225 F.


Place all your pretzels on a cookie sheet and start unwrapping your kisses.


Place one kiss per pretzel right in the center.


Bake for 2 - 3 minutes, just until they are melty enough to push a M&M in. {as you can see I tried one M&M early and the kisses weren't quite ready - oops!}


Then...M&M them! :)

Ta da! So easy...and they are throw in your mouth good! Mmmm...I am going to start making these every year!
Cheers,

Thursday, December 15, 2011

Letters

Dear Christmas Tree:
I am so glad that I added  red to you this year. You look so pretty.

Dear Cake Pops:
Why do you have to be difficult for me? When other people make you and take pictures, you look stunning.

Dear Grannie's Advent Calender:
Where is the hotel lotion? The plastic Avon Chapstick? Shower Caps or Shoe Horns or Keychains like all the years before? I am getting good stuff this year...I like it :)

Dear Dance:
What am I going to do with a full month off?

Dear Sparkley Pointsetta:
I can't seem to keep you alive. Too much water? Too little water? Not enough love? I dunno.

Dear Friend #8:
Sorry I thought you were friend #10 when you text me last night....the numbers are getting to high and it is hard for me to remember which friend is what number! I got it now!!! Thanks for calling :)


Happy Thursday Everyone!
Cheers,
Messy

Monday, December 12, 2011

Item of the Week

Happy Monday Everyone!!!!

Hope you all had a great weekend. I had a busy one, so it didn't even feel like a weekend. Barely even saw My Paddy and now he is gone to work again {sigh}...I'm so tired of this. :(

Anyways...

Upper Class Trailer Trash Painting

WAS $14.00

THAT'S HALF PRICE!!!!

So head over to our shop now - this deal only lasts until Sunday!!!! :)

**Remember you can order this item with any color background you want. Just let me know in the comments when you order.

Cheers,
Messy

Friday, December 9, 2011

Merry Mom Memories: Cherry Tarts

I am starting a new segment today 100% for my MOM!!!! {I love you!}

I have to admit I miss my Mom a very large amount during the holidays because we used to have so many traditions together. Baking was a big one. We would put on Christmas music and make sugar cookies, cherry tarts, date squares and mars bar bites. Mmmm...but cherry tarts are my favorite :)

Here is my version - the quick and easy way. They will never be as good as my mom's, but this is a good alternative...

What You Need:
~ Flour
~ Pillsbury Pie Crust
~ Cherry Pie Filling

STEP ONE: Preheat your oven to 350F.
STEP TWO: Spray your cupcake tin with Pam or something of that nature.

STEP THREE: Open and lay out one half of your Pillsbury Pie Crust. Make sure to lightly dust your counter with flour to prevent sticking.


STEP FOUR: Using a round cookie cutter or glass the same size as your cupcake cups, make circles and place into tin.


STEP FIVE: Place two or three cherries and some jelly in each one.

STEP SIX: Bake for 10 minutes or until golden brown on the edges.


STEP SEVEN: Using a knife, pop out your tarts and place on cooling rack to set.

Donearoonie! :)

Let me know how it goes!!!

Miss you Mom, feel free to have cherry tarts and Mars Bar Squares ready for my arrival in
13 DAYS!!!!

Cheers,
Messy

Thursday, December 8, 2011

Etsy Love ~ Snowflakes

2010 Quilled Snowflake

Snow Garland - a strand of soft white felt balls - shipping on December 14 or 15

Snowflake Earrings (Winter White Snow - Plastic, Silver Plated Ear Studs) - FREEDOM

CROCHET PATTERN Let It Snow Beanie (5 sizes included: newborn-adult) permission to sell finished item

WINTER SNOW tree - Scrabble Tile Pendant - Fun Affordable Gift

SALE, 3 Blown Glass Snow Globe Holiday Ornaments

Let it Snow - Pillow Cover


I love snow! :) We just got our first slight skiff last night! YAY!

Cheers,
Messy

Tuesday, December 6, 2011

Grrrr....

My internet has been down ALL DAY!!!! I absolutely hate that!!!! Ruins my day becaues I like to get all my 2Messy work done in the morning. You know, respond to comments, check out my Bloglovin' feed, etc. etc. Just threw my whole day off.

So screw it. Here are some super funny posters to make you giggle before you go to sleep! :)


Good Night,
Messy

Monday, December 5, 2011

DIY ~ Christmas Baskets!!!

Sorry guys I didn't take enough pictures! It was freezing out and I had to take my gloves off every time to snap a shot...so needless to say, I didn't take very many.

This is me just posting about my lovely little railing baskets out front. If you have been here before then you know I changed them for the summer and for fall, so here is Christmas! :)

Start with cedar, fir or twig branches. {I used East Coast Cedar which I had never seen before because I grew up on the West Coast.}

Take out all your fall leaves, pumpkins, etc. from your previous baskets.

Stick the new cedar or fir branches into your dirt.
Add decorative items. I used pine cones, some silver Christmas balls and some long red sparkly faux flower branch.
TA DA!!!! Front door Christmas Decor! :)

I also filled my special reindeer baskets with the same sort of decorations. My Dad made me these and I love them because they make me think of home. My mom always had these guys on our front porch filled with holly from my Grandpas house :) Memories.
Aren't they cute????

So, now my front stoop is Christmafied...onto outdoor lights and inside :)

Cheers,
Messy